
When store owners ask how much does 3d product visualization cost typically, the honest answer is that we price projects by scope rather than off a flat menu—because rendering five angles of a smooth cosmetic bottle from an existing CAD file is a very different job from reconstructing an upholstered armchair or a multi-part espresso machine from photographs. There is no single reliable "typical" price we can hand you; what we can show you is exactly how a quote is built, so you can brief any studio well and compare quotes fairly.
At 3D Vision Art, we do not publish flat rate cards or generic price ranges, because a blanket number either overcharges you for a simple SKU or under-scopes a complex product that needs macro close-ups and interactive web files. You will find price ranges published by other providers—treat them as a yardstick, not a quote: the same product can land at very different points depending on its materials, source files and outputs. Instead, every quote here is built from six concrete production variables: product complexity, the source files you supply, distinct shapes versus color swaps, the outputs you need, resolution and close-up detail, and the revision and handoff terms.
Here is an inside look at how a 3D product visualization quote is actually calculated, which factors raise or lower the effort, and how to structure your brief so you can avoid paying for work you do not need.
[IMAGE PLACEHOLDER 1 — TheTwo Phases of a 3D Visualization Quote]
- Suggested Image Description: A clean two-part diagram for buyers: Phase 1 ("One-Time Setup Effort: Building & Approving the Master 3D Product Asset" — geometry, UV layout, PBR materials, and virtual studio lighting) and Phase 2 ("Marginal Output Effort: Generating Views & Variants" — additional camera angles, colorways, lifestyle scenes, and
.glb/.usdzweb exports at a fraction of the initial setup work).- Suggested Alt Text: Diagram separating the one-time setup effort of building a master 3D product model from the lower marginal effort of rendering additional views and variants.
The Most Important Pricing Rule: One-Time Asset Setup vs. Marginal Outputs
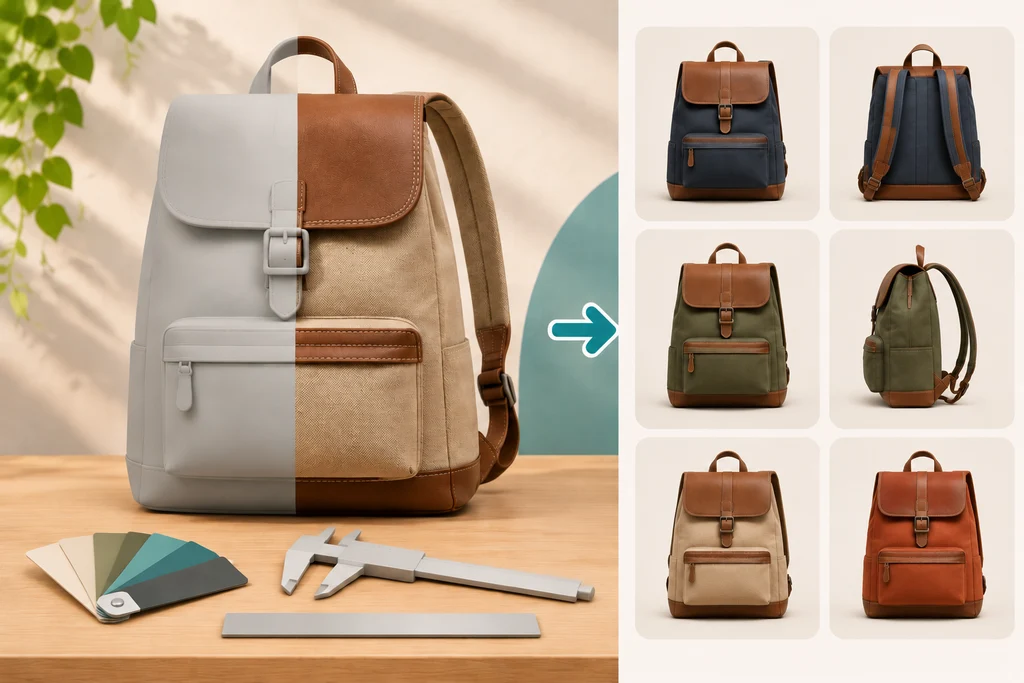
Before looking at individual cost drivers, every ecommerce buyer should understand how 3D economics differ from traditional studio photography.
In a physical photoshoot, the effort tends to grow with every item: if you ship 10 colorways of a product to a photographer, the crew still has to unpack, steam or clean, place, light, shoot, and retouch each physical item—even when the studio, the set, and the lighting rig are shared between them.
In 3D product visualization, the work is front-loaded into building the Master 3D Product Asset:
- The upfront build (where most of the hours go): Constructing or cleaning the 3D geometry, laying out UV coordinates (the map that tells the model where each material, label, and seam belongs), calibrating physically based rendering (PBR) materials—materials that react to light the way the real thing does, such as brushed metal, leather grain, or refractive glass—and locking the virtual studio lighting rig.
- The downstream outputs (where 3D saves money): Once that master 3D scene is approved, adding three more white-background camera angles or swapping the housing from matte black to brushed silver usually takes much less work than the initial build—because the geometry and lighting already exist.
None of this means 3D always wins on price. If you only need a few simple products photographed once, a photo shoot can cost less. 3D tends to pay off when you reuse the model for many views, colorways, and updates, or when the product does not exist yet.
The 6 Factors That Drive a 3D Product Visualization Quote
When you send a project enquiry to a 3D studio, the team evaluates six variables to calculate the production hours required. We also cover the engineering side of these scope variables in our studio note on what changes the cost of a 3D product visualization project.
| Quote Driver | Lower Production Effort (Reduces Your Quote) | Higher Production Effort (Increases Your Quote) |
|---|---|---|
| 1. Product Geometry & Surface Complexity | Rigid, geometric packaging, bottles, boxes, or simple hard-surface items with uniform finishes. | Complex mechanical assemblies, intricate surface details such as knurled grips and perforations, or soft goods with natural fabric folds, piping, and stitching. |
| 2. Source Files You Supply | Clean engineering CAD files (.STEP, .IGES, SolidWorks) paired with vector label artwork (.SVG/.AI) and clear material specs. |
No CAD available—reconstructing the entire 3D model from reference photographs and manual measurements. |
| 3. Distinct Product States vs. Color Swaps | 1 base geometry shared across multiple color or material finishes. | Multiple distinct physical shapes, sizes, regional control panels, or modular attachments that each need separate modeling. |
| 4. Number & Type of Visual Outputs | Clean white-background (#FFFFFF) or transparent packshots rendered under one consistent studio lighting setup. |
Custom architectural lifestyle room scenes (requiring 3D set dressing, props, and custom lighting), exploded views, or real-time .glb/.usdz web assets. |
| 5. Resolution & Close-Up Framing | Standard web catalog resolution (around 2048 × 2048 px, the size Shopify recommends for square product images) viewed at full-product distance. |
Extreme macro crops (requiring modeled bevels, thread geometry, and high-density textures) or ultra-high-resolution print billboards. |
| 6. Revision Workflow & Source File Handoff | Staged sign-off (approving clay geometry first, then materials, then final renders). | Unstructured feedback where shape changes are requested after final renders and web files are already completed. |
1. Product Complexity (Hard-Surface vs. Soft Goods vs. Refractive Materials)
Not all objects take the same time to build and shade:
- Simple hard-surface products: Supplement jars, boxed packaging, Minimalist shelving, or smooth electronics enclosures can be modeled and unwrapped quickly.
- Detailed mechanical or automotive products: Products with hundreds of interlocking parts, vents, cables, and contoured bodywork (like our commissioned SAR 700 and Ford Mustang projects) require significantly more modeling and UV preparation hours.
- Soft goods and complex shaders: Upholstered sofas, backpacks, footwear, and garments require sculpting natural creases, seam welt cord, and micro-weave fabric shaders, while clear glass bottles containing liquids or gemstones require complex light-bending (refraction) tuning.
2. What You Send the Studio (CAD vs. Photos)
As studio production guides from Maverick Frame and Orbe3D note, the state of your starting files has a major impact on modeling hours:
- When you have CAD files: Even though engineering CAD (
.STEP,.IGES) still needs cleanup—stripping hidden internal screws and converting the engineering surfaces (NURBS) into clean polygons—it gives the artist exact dimensions and proportions on day one. - When you only have photos and measurements: Reconstructing a product from photographs is completely normal, but the artist must block out and verify every proportion by hand before texturing can begin.
3. Distinct Product States vs. Color Swaps
One base shape can carry many finishes. If your product comes in six colors that share the exact same geometry, the modeling is done once, and each additional colorway only needs the new material set up and rendered. The quote climbs when the variants stop being color swaps: a different size, a regional control panel, or a modular attachment is new geometry that has to be modeled and approved separately. This is why two catalogs with the same number of SKUs can receive very different quotes.
4. Number & Type of Visual Outputs (Packshots vs. Lifestyle Scenes vs. Web Files)
Once your product is modeled and textured, the quote separates studio packshots from environmental lifestyle renders:
- White-background or transparent packshots: Setting up a virtual studio backdrop and rendering Front, Back, Side, Three-Quarter, and Top views is highly efficient. Adding extra angles inside the same studio lighting setup adds far less effort than the original build.
- Custom 3D lifestyle scenes: Placing your espresso machine on a sunlit kitchen counter or your sofa inside a styled Scandinavian living room requires building or curating the room architecture, selecting complementary props, and balancing natural window light so the product stays the hero.
If you only need 2D still images (.PNG, .WebP, .TIFF), the artist can use high-density offline geometry and renderer-specific shaders (such as Blender Cycles).
If you also want an interactive 3D web viewer model (.glb) and mobile AR file (.usdz) for Shopify or Google <model-viewer>, those files come from a dedicated optimization pass on the same master model—simplifying the mesh (retopology) toward Google's ideal range for Android AR of 30,000–50,000 triangles (its recommended limit is 100,000) and baking the materials into compact 2048 × 2048 px textures in the glTF 2.0 PBR format. That optimization is its own piece of work, with its own place in the quote. And if you want AR only from the start, the model is built for AR directly, and the cost is that build itself. Commissioning your still renders and your .glb/.usdz web assets together in the same project is often simpler than hiring two separate vendors, because both come from the same master model, so the product is not modeled twice.
[IMAGE PLACEHOLDER 2 — How Staged Approvals Prevent Costly Rework]
- Suggested Image Description: A 4-gate approval timeline showing how structured sign-offs keep a 3D project on budget: Gate 1 (Clay Geometry & Proportions Approval) ➔ Gate 2 (Camera Angles & Lighting Approval) ➔ Gate 3 (Material & Swatch Approval) ➔ Gate 4 (Final High-Resolution Batch Renders & Web File Delivery).
- Suggested Alt Text: Four-stage 3D visualization approval workflow showing clay geometry, camera framing, material look-development, and final delivery gates.
5. Resolution & Close-Up Framing
A standard catalog image—viewed at full-product distance—lets the artist represent fine details like speaker grilles, fabric weaves, or knurled dials with flat texture maps. A macro close-up shows those same details at near-real-life scale, so the bevels, thread geometry, and textures have to be modeled and rendered at a much higher density. The same applies at the other extreme: an ultra-high-resolution print billboard asks more of the model and the textures than a web catalog image does. Tell the studio where the images will actually be used, and the quote can be scoped to that.
6. Revision Workflow & Source File Handoff
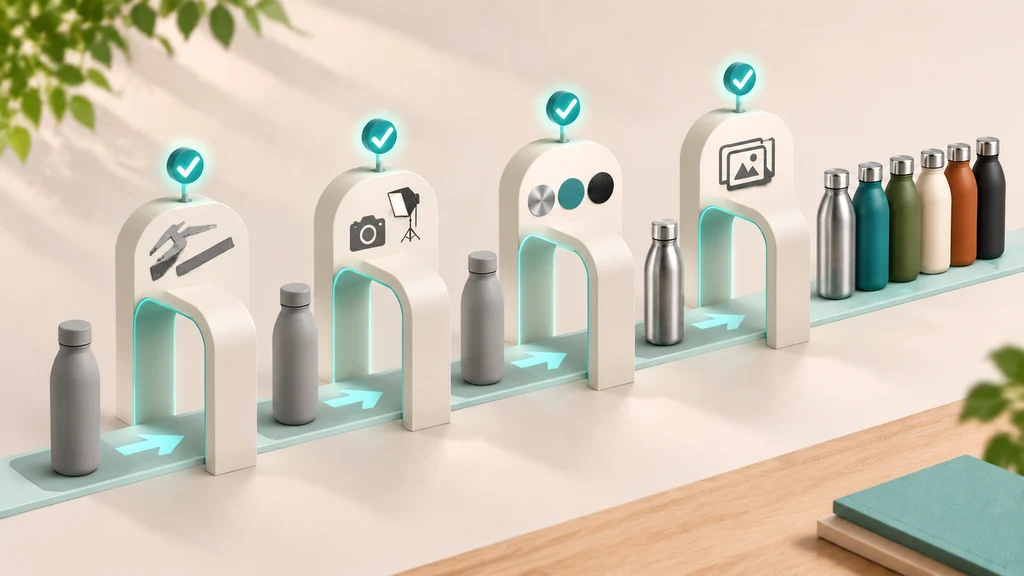
To keep quotes predictable, we use a staged review cycle—approving the untextured clay geometry first, then the camera framing and materials on a single hero SKU, and only then batch-rendering the full variant list. For a practical template you can copy, read our guide on how to write a 3D product rendering brief that a production team can use.
Always clarify upfront whether your quote includes only the final flattened images (.PNG/.WebP) or also transfers the organized master 3D scene files (.blend, .ma, .max) or standalone .glb packages. Whether the quote includes the master 3D scene files and reuse rights can change the price, so ask for it to be stated as its own line in the quote.
Two More Things That Can Move a Quote: Deadline and Volume
A tight deadline changes how a studio plans its capacity, and so does a very large batch—dozens of products at once are planned differently from a single hero product. Tell the studio your timeline and your total number of products and variants when you ask for a quote, so both are priced in from the start rather than added later.
How to Compare Two Quotes Fairly
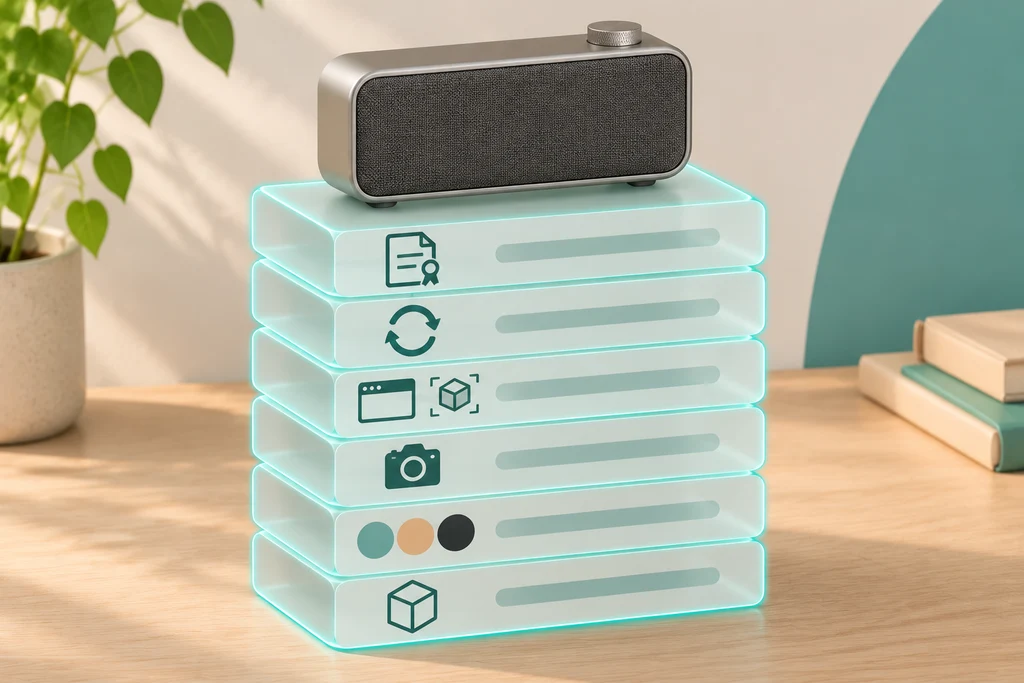
When you compare quotes, check that each one states separately: the 3D model for each product, the variants (color swaps versus new shapes), the still images and background types, any web or AR files, how many revision rounds are included, and whether you receive the master files and usage rights. Two quotes only compare fairly when they count the same things. And if you have many products, ask for a quote on one representative product first, then use it to estimate the rest.
Frequently Asked Questions About 3D Product Visualization Costs
Is it cheaper to render 10 products at once than 1 product by itself?
Yes—per-product effort often drops when you batch related items, especially if those products share a product family, use the same material library (such as the same anodized aluminum and leather swatches), or are rendered inside the same virtual studio camera and lighting template.
Why does a 3D quote change if we add one macro close-up shot?
A wide full-product render can represent fine details like speaker grilles, fabric weaves, or knurled dials using flat texture maps. A macro close-up shows them at near-real-life scale, so the artist has to model bevels and thread geometry and use higher-density textures, which adds modeling and render time.
Do color variants cost the same as modeling a brand-new product?
No. Once the base 3D geometry is approved, additional colorways or material finishes that use the exact same physical shape only need the new material set up and rendered—usually much less work than the first SKU.
Can I get a rough budget before I send my files?
A rough indication needs at least a link or photos of the product and a list of the outputs you want. A clear, final quote needs the full picture—source files, dimensions, variants, and deliverables—because each of those can move the price.
Does the quote include revision rounds?
That depends on what is agreed before work starts. A clear quote states how many revision rounds are included at each approval stage—which is exactly why the staged approval cycle matters: feedback given at the clay and material stages is far cheaper to act on than feedback given after the final batch is rendered. If a studio's quote does not mention revision rounds, ask before you sign.
Do I receive the 3D files after the project?
Only if that is part of the agreement. Some quotes cover the final images alone; others also hand over the organized master 3D scene files or standalone .glb packages, and that handover can change the price. Decide which you need before the quote is written, not after.
What information do you need from us to give a clear quote?
To give you a clear quote, we need to see the product (a link, photos, or a CAD file), the dimensions if you only have photos, how many products and variants you have, and which outputs you need (for example: "5 white-background angles + 1 lifestyle scene + a Shopify .glb/.usdz file"). If something is missing, we will tell you what to add.
Want a Clear, No-Obligation Quote for Your Products?
If you want this done for your products—with a clear scope breakdown, staged approvals, and photorealistic studio renders tailored to your catalog—see our 3D Product Rendering Services. Every brief is reviewed carefully before we quote, so the plan is built around your actual products.
Send us a link or a few photos of your product line, how many products and variants you have, and the outputs you need.
Get a Free Quote ↗