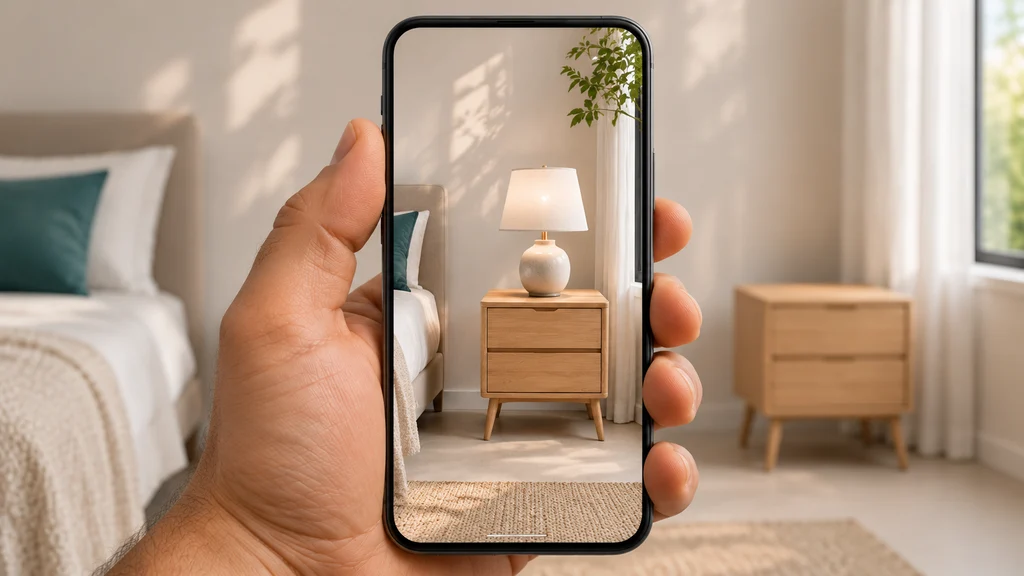
AR product visualization is the process of turning a physical product into a true-to-scale, photorealistic 3D digital model that online shoppers can project into their real-world environment through a smartphone or tablet camera.
For a brand manager or ecommerce lead, the difference between a convincing AR preview that closes a sale and a flawed preview that triggers a return usually comes down to two things: what the shopper experiences on their screen and what product data your brand supplies to the 3D studio.
Here is a clear, jargon-free look at both sides of the equation—so you know what a trustworthy AR product visualization looks like and what to hand over when you commission it.
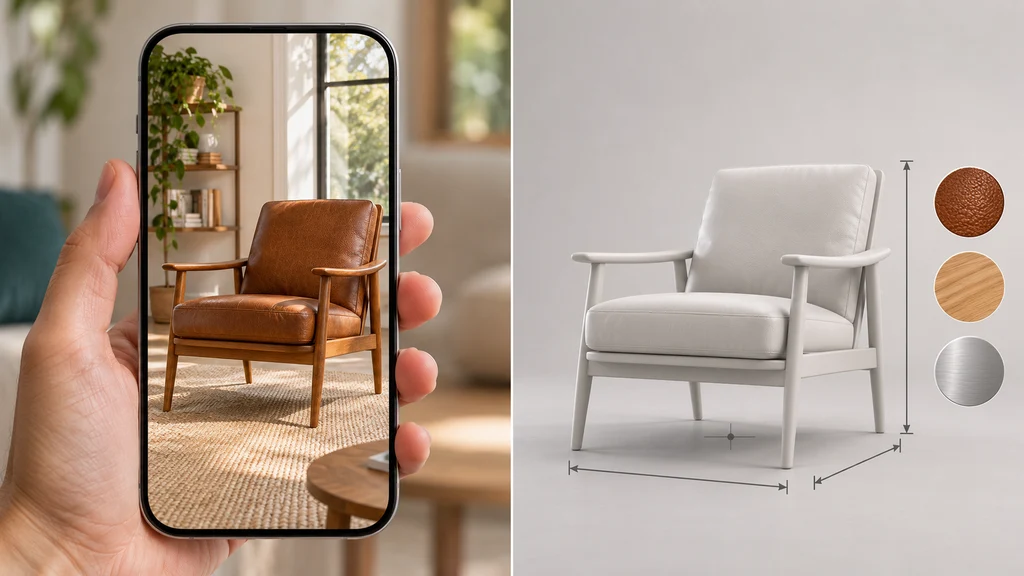
Part 1: What the Shopper Actually Sees (Step by Step)
To understand why some AR product visualizations build buyer confidence while others feel unreliable, walk through the experience from your customer's phone screen.
In practice, a modern browser-launched AR session usually plays out in four steps:
1. The On-Page 3D Preview and the "View in Your Space" Prompt
The shopper lands on your product detail page (PDP) on their iPhone or Android phone. Because this runs through browser-launched AR—the button opens a native viewer, Apple AR Quick Look on iOS Safari or Google Scene Viewer on Android Chrome—tapping the button opens the camera without an app download.
2. Surface Detection and 1:1 Placement
The phone prompts the shopper to point their camera at the floor or a tabletop and move the device slightly. Placing a product on a wall—for mirrors, sconces, or wall art—works differently: vertical surfaces are not enabled by default in Google's Scene Viewer, so your store's AR setup has to switch vertical placement on. A correct model file on its own is not enough for wall placement.
- If the product is a 45 cm tall table lamp, it appears 45 cm tall on the customer's nightstand.
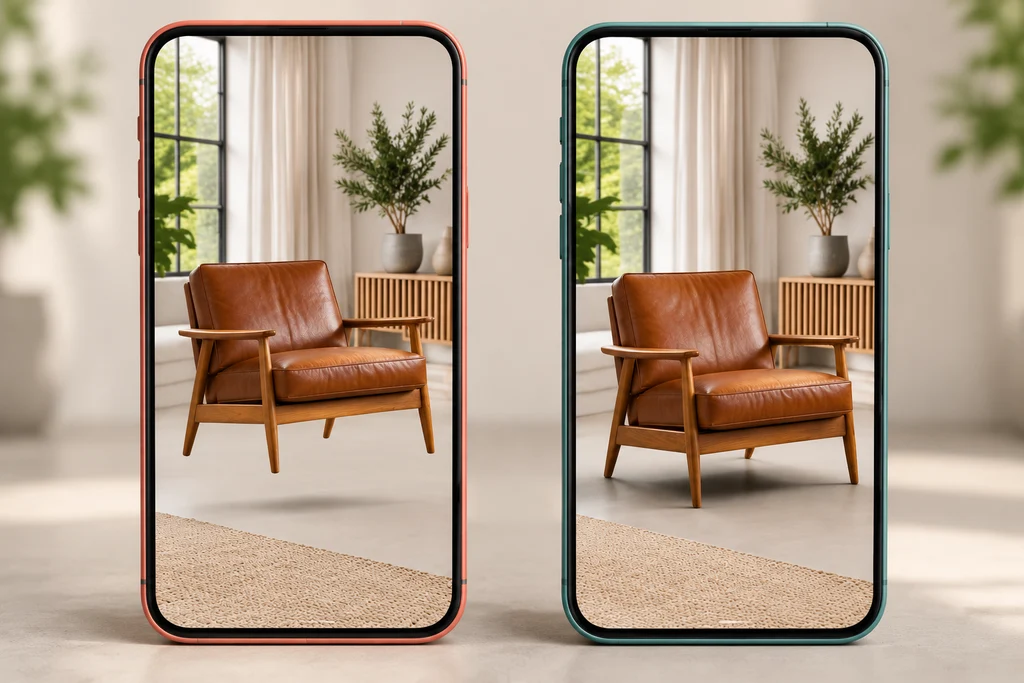
- Because the 3D model's anchor point sits at its physical base, the feet of the product sit flush on the real surface rather than hovering in mid-air.
- A real-time shadow can form underneath the product, helping it look anchored to the floor or counter—though how that shadow looks depends on the viewer; Google's Scene Viewer, for example, draws it automatically as a hard-edged shadow.
3. Walking Around and Checking Real-World Lighting
This is where physically based rendering (PBR) materials matter. As the shopper walks around the virtual product or moves their phone closer:
- Real-room light estimation lets the viewer simulate the room's lighting, adjusting the brightness and reflections on the 3D model so it sits more naturally in the space—though the exact result varies by phone and viewer.
- The shopper can rotate the item with two fingers to line it up against a wall, slide it into a corner to check clearance between a sofa and a doorway, or step close to inspect stitching and hardware.
- When the size, materials, and lighting all hold up under that close inspection, the AR view does the job of an in-store look: the shopper judges the product on what they actually see, not on a guess.
4. Returning to the Product Page to Checkout
When the shopper closes the AR view, they land right back on your product page, ready to add the item to their cart. Whether the colorway they picked is the one that opens in AR—and the one still selected when they come back—depends on how your store links each product option to its AR file; it does not happen automatically just because the 3D files exist.
What Breaks the Shopper's Trust in AR (Common Failure Points)
When an AR product visualization fails to convert, it is usually an asset preparation mistake that makes the product look untrustworthy:
| What the Shopper Notices | The Hidden Asset Mistake Behind It | Why It Hurts Your Store |
|---|---|---|
| Product looks giant or toy-sized | Exported in centimeters or inches instead of meters (1 unit = 1 meter). |
Shopper cannot trust the dimensions and leaves the page. |
| Product floats 10 cm above the floor | The product's anchor point was left in the center of the object instead of at its base. | Breaks the illusion of physical placement immediately. |
| Wrong color opens in AR | Shopper picked "Crimson Red" on the page, but the AR button loaded the default white .usdz or .glb URL. |
Creates confusion over which SKU will actually ship. |
| Dark black blotches or invisible undersides | Gaps in the model's surface, overlapping surfaces, or incorrectly oriented faces (Shopify 3D QA Standards). | Makes a premium physical product look poorly constructed. |
| Shopper pinches the screen and resizes the sofa | Scaling was not locked in the AR launch link. | Shopper accidentally shrinks a large sofa to fit a small corner, orders it, and returns it when it doesn't fit. |
We cover how to prevent two of these handoff issues in our studio notes on validating a USDZ Quick Look link for iOS product AR and keeping the selected product finish when launching mobile AR.
Part 2: What Your Brand Must Supply to the 3D Studio
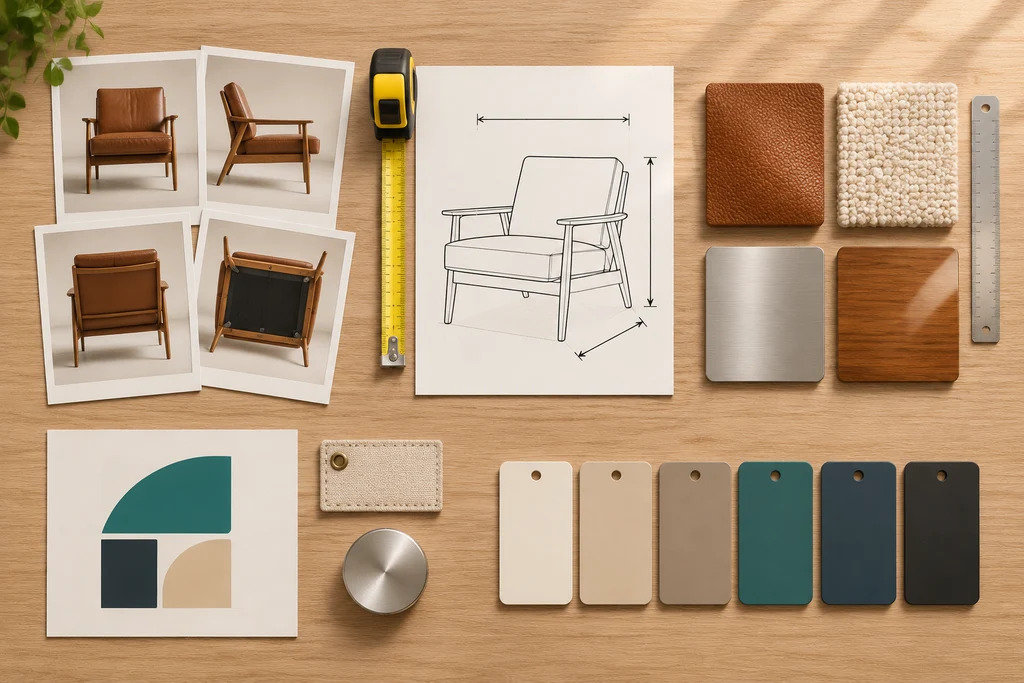
Store owners often hesitate to start an AR project because they assume they need industrial blueprints for every part. Whether your studio uses polygon modeling from scratch, CAD cleanup, or automated studio photogrammetry, here are the five inputs your brand needs to supply so the 3D artist can build an accurate, fast-loading AR asset without guesswork.
1. Shape References (CAD Files or Multi-Angle Photos Including the Bottom)
If your product was designed in industrial CAD software (SolidWorks, Rhino, Fusion 360) and you have a .STEP, .IGES, or .OBJ export, send that first. CAD gives the artist exact mechanical proportions.
If you do not have CAD—which is completely normal for furniture, footwear, bags, ceramics, and soft goods—supply clean reference photographs from every angle:
- Front, back, left, right, top, and three-quarter views.
- Crucially, include the underside and back panel. In a 2D photoshoot, nobody sees the bottom of a chair or the back of an appliance.
2. Verified Outer Dimensions (Width, Depth, Height, and Key Clearances)
Even when supplying photos or scans, always provide a written spec of the product's real-world bounding dimensions (for example: Width: 620 mm, Depth: 580 mm, Height: 810 mm, Seat Height: 460 mm). As emphasized in Shopify's 3D creation guidelines, accurate dimensions matter—the studio uses these exact figures to build the exported .glb and .usdz models at your product's true size.
3. Material and Finish Evidence (Beyond a Hex Code)
A hex color code (#3B2F2F) tells a 3D artist the flat pigment of a surface, but it says nothing about whether that surface is high-gloss lacquered wood, matte powder-coated steel, pebbled full-grain leather, or woven bouclé fabric.
- Close-up macro photos taken in neutral daylight showing the surface grain, weave, or metal brushing direction.
- A grazing-angle photo showing how light rolls across the surface (so the artist can calibrate roughness and metallic response).
- If weave or wood-grain scale matters, a quick photo with a ruler placed next to the material so the texture repeat is mapped at 1:1 scale.
4. Vector Graphics for Logos, Labels, and Dials
Shoppers using AR and 3D viewers frequently zoom in on brand badges, stitched tags, control dials, and serial plates. So send the originals, not screenshots: the vector logo and label files (.svg or .ai) at their original quality, clear close-up photos of any printed labels, dials, or serial plates those files do not cover, and your exact brand colors—plus a note on any differences between variants, such as a logo that changes color on the black version.
5. Your Target Storefront Setup and Variant List
Let the studio know where the asset will live before modeling begins:
- Platform: Are you uploading directly to Shopify's native product gallery, embedding Google's
<model-viewer>on WooCommerce or a custom site, or feeding a 3D configurator? - Placement surface: Does this product rest on a horizontal floor/table or mount on a vertical wall (mirrors, sconces, wall art)?
- Colorways and variants: List all sellable SKU finishes upfront so the studio can set up the model's surfaces and materials once across all variants.
How the Studio Turns Your Inputs Into Fast Mobile AR Files
Once you hand over those five inputs, the studio simplifies the geometry into a clean, lightweight mesh (Google's guidance for Scene Viewer puts the ideal range at 30,000 to 50,000 triangles, with 100,000 triangles as the recommended performance limit, not a hard ceiling), bakes surface details into compact PBR textures (up to 2048 × 2048 px, the recommended maximum for mobile AR), and checks color response under the Khronos PBR Neutral Tone Mapper. No tone mapper can promise identical colors on every phone screen—screens, viewers, and room light all play a part—so the studio checks your materials and colors in the viewing environments your customers will actually use. Finally, both the .glb (targeted around 4 MB per Shopify's partner guidelines) and the .usdz archive are tested for scale and placement before delivery.
What Decides the Cost of 3D and AR Assets?
Brands usually ask what this costs before they ask anything else, so it is worth knowing what the price actually depends on. Four things drive it: how complex your product's shape is, how demanding its materials are (leather, glass, and brushed metal take more care than a matte plastic), how many colors and variants you sell, and how many rounds of revisions you need. The clearer your dimensions, references, and material evidence are up front, the fewer revision rounds it usually takes. Because every product differs, an honest quote can only come after the studio sees yours.
Frequently Asked Questions About AR Product Visualization
Why can't we just use a smartphone scanning app to make our own AR models?
Smartphone LiDAR and photogrammetry apps (such as Apple Object Capture) work well for capturing rough reference shapes of matte, textured objects. But a scan is a starting point, not a finished AR asset: transparent and reflective products—glass, mirrors, polished chrome—scan poorly, fine details like stitching, engraving, and thin parts often come out soft or misshaped, and the scan's dimensions and materials still need checking and correcting before the model is accurate enough to sell from. Treat scanning as a way to capture reference, not as a substitute for a properly built model.
Why do we need both a GLB file and a USDZ file?
Android browsers and web viewers read .glb (the binary format of the Khronos glTF 2.0 standard), while Apple's AR Quick Look on iPhone and iPad requires .usdz. Two practical notes: Quick Look also accepts .reality files, and if your store runs on Shopify, the platform supports both formats and can convert between them from a single upload in its supported media flow—so on Shopify you may only ever handle one file. On other platforms or custom sites, plan on receiving both from your studio.
How do we stop shoppers from accidentally resizing the product in AR?
Lock 1:1 scaling in your launch code—using #allowsContentScaling=0 on Apple AR Quick Look links, resizable=false on Android Scene Viewer links, or ar-scale="fixed" in <model-viewer>.
Can we use the same 3D model for our studio product renders and our AR view?
Yes. The workflow usually looks like this: the studio builds one high-detail master model for your 4K studio renders, and the lightweight .glb/.usdz AR files are optimized versions made from that same master—lighter geometry and mobile-ready textures. That optimization is extra work on top of the master model, so expect it to be priced as its own step. And if you want AR only, with no renders, the studio can build the model for AR directly from the start.
Need Reliable 3D and AR Assets Built From Your Product Specs?
If you want this done for your products—so shoppers see true 1:1 dimensions, accurate materials, and fast-loading AR previews on both iPhone and Android—take a look at our 3D & AR Assets for Ecommerce service.
Send us a link to your products or a few reference photos.
Get a Free Quote ↗