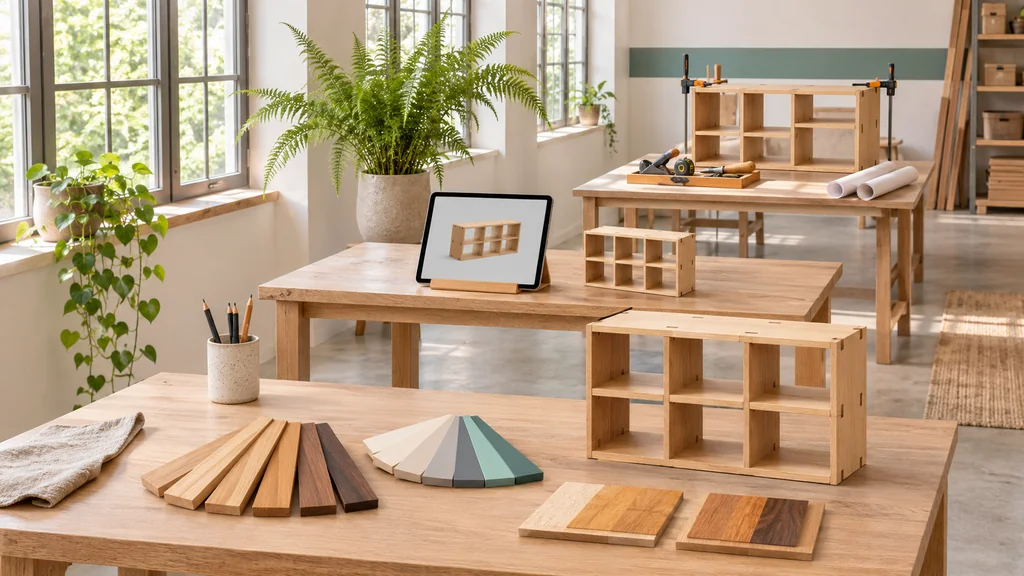
There are three ways to put a product configurator on your Shopify store: using built-in variants, installing a configurator app, or commissioning a custom build. The best approach is to start with the simplest option that covers what your shoppers need to choose, what they need to see on the page, and how their selection turns into an order. The rest of this guide walks through how to make that call and what each route asks of you.
What counts as a product configurator?
A product configurator is any set of controls that lets a shopper change how a product is set up. That can be as straightforward as size and finish buttons that swap to a matching product photo, or it can be a live, interactive 3D view that updates on the spot as the buyer swaps parts, colors, or materials.
Keeping that distinction in mind matters because not every customizable item actually requires real-time 3D. When clear product photography already explains the choices well enough, a simpler setup will often do the job.
You should also separate a 3D viewer from a 3D configurator. A 3D viewer simply lets a customer spin and inspect a single model. A configurator ties the shopper's choices directly to changes in the visual preview and passes the exact details needed to fulfill the order.
Because of that, uploading a 3D model into Shopify's standard product media section is not the same thing as launching a configurator. Map out the options your customers will pick and how the order should behave first, and then decide how the visual preview needs to work.
Level 1 — Shopify's built-in variants
In Shopify, an option is a category like size or color, while a variant is a specific combination you actually sell, such as a large cabinet in an oak finish.
Shopify supports up to 3 options and 2,048 variants per product. Because you set the price, inventory count, and shipping details for each individual variant, built-in variants are well worth looking at whenever your customer choices map cleanly to separate SKUs you track and manage.
For a simple setup, write out your option categories, generate the combinations you sell, and upload product photos that clearly show the differences between them. Then check your live product page to see how your theme displays the option buttons and swaps the matching images.
This approach works nicely for something like a homeware line where shoppers pick a size and a finish without needing to visually piece together separate parts on screen.
Where the limits matter
Once a product goes beyond 100 variants, you will run into some real platform limits. Certain third-party themes, theme app extensions, public apps, and sales channels may not support more than 100 variants, and Shopify's own Stocky app and the legacy Order Printer app do not support them either. If your store relies on custom apps, those apps have to use the GraphQL Admin API. Even though Shopify raised the ceiling from 100 to 2,048 variants, plenty of themes and apps still act as if the old 100-variant cap is in place — so always test one product first before building a large catalog around the full 2,048-variant allowance.
You also should not confuse Shopify's built-in options with a live 3D preview. While Shopify lets you add images, 3D models, and videos to your product media gallery, models and videos cannot be used as product variant media. Do not assume that clicking a new finish button will automatically update an uploaded 3D model.
Go with built-in variants when your option structure fits inside Shopify's rules and static photos explain the choices clearly. If your product needs dependent rules, like limiting which accessories can be chosen based on the selected base model, treat that as a requirement to verify before you commit. Shopify allows three options per product. When you need more than three options, you can bring in a third-party app, add custom input fields to your theme (line item properties), or, if you are on Shopify Plus, link products together using the Combined Listings app.
Level 2 — Configurator apps
A configurator app is an off-the-shelf system that you run under the app provider's plan rules and feature limits. Paid tiers almost always come with a recurring monthly subscription.
When an app's existing controls match the way your product is built, it can get you up and running much faster. Even so, you still have to put together the option list, the visual preview assets, and the ordering rules yourself. Treat installing the app as the starting line of your setup rather than a finished shopper experience.
What the verified listings show
Kickflip product configurators offers live previews from multiple camera angles, text and image personalization, multi-component options (for products assembled from several customizable parts), dynamic pricing, and live color swapping. Here, dynamic pricing simply means the price shown on the page updates automatically as the shopper selects different options.
As listed on the Shopify App Store in November 2026, Kickflip's pricing is $59/month, plus a fee on each custom product sale that starts at 1.95% and drops as your sales volume grows, all the way down to 0%, backed by a 14-day free trial. The listing includes unlimited products, page views, and storage. White-label branding removal — which takes the app's own logo off your storefront — is a paid add-on at +$49/month, and its configure price quote add-on, a feature that lets buyers configure a product and ask for a quote instead of checking out right away, costs +$99/month.
Those generous allowances for products and storage do not guarantee that every option tree or custom interaction is supported. Always ask how your specific product would be set up inside the tool and confirm which features are included in the plan you intend to buy.
Zakeke – Customizer 2D & 3D lists a free plan, though that tier is strictly for development stores. On a live store, Zakeke runs on paid plans tied to how many configured products you publish, plus a transaction fee on customized sales. Its own pricing page (November 2026) lists monthly plans at $69.90, $129.90, and $299.90 with per-sale fees ranging from 1.9% to 1.5% (1.9% / 1.7% / 1.5% across the three tiers); because the plan details on its Shopify listing have varied between snapshots, double-check the current listing before you install. Its listing covers live preview, a 3D configurator, a 3D & AR viewer, and virtual try-on, with several of those features locked to higher-tier plans.
We share these two listings simply as concrete examples of how you should evaluate the app route, not as a ranking or endorsement of either platform.
Check the fit before subscribing
Simpler product-options apps can easily handle things like an engraving text box without needing a 3D preview at all, so ask yourself whether your product truly needs 3D before signing up for a full configurator app.
Take one representative product from your catalog and use it to check:
- Whether the app supports your exact option structure and any compatibility rules between choices.
- Whether the on-screen preview shows the fine details your buyers actually need to judge.
- Which features come included in your base plan, which require a higher tier, and which are sold as paid add-ons.
- Whether keeping the app's visible branding on your page is fine, or whether removing it costs extra each month.
- How the customer's chosen options, custom text, and updated price flow into the cart and the final Shopify order.
Never assume that an app's allowance for how many products you can publish is the same as how many options a single product can have. Whenever an app listing leaves something unclear, ask their support team before you build. A well-matched app is a very practical solution, whereas a poor fit will force you into awkward compromises or extra development work.
Set up the app route
- Pick one representative product and write down all of its options, combination rules (which parts are allowed to go together), and any custom text the shopper types in.
- Install the app from the Shopify App Store and check its listing to confirm theme compatibility and see which plan tier includes the exact features you need.
- Ask the app provider what 3D model files their system expects. Configurators almost always need the 3D model split into separate parts with clearly named materials, so confirm the app's technical specs before anyone prepares your 3D files.
- Build the configurator inside the app dashboard, connect it to your Shopify product, and place it on your product page using the app's setup instructions or theme app block.
- Test the entire buying flow from start to finish: click through the options, add the product to the cart, run a checkout in test mode, and verify what shows up in both the cart and the Shopify admin order page.
- Inspect the live page on both mobile phones and desktop computers across the specific devices your customers use.
Level 3 — A custom-built configurator
A custom build is engineered specifically around your products and the way your customers buy them. Depending on what you need, the scope can cover an interactive 3D viewer, swappable parts, colors, and materials, and an optional live preview for custom text or engraving.
AR, or augmented reality, lets mobile shoppers project a 3D model into their real-world room on supported devices. If you want AR included in your custom configurator, put that requirement in your project brief explicitly and ask how the buyer's chosen configuration will carry over into the AR view. Never assume AR comes built in just because the product page has a 3D viewer.
Ownership and ongoing responsibility
Instead of paying a recurring subscription for a configurator app, you can commission a custom configurator as an owned, one-time build. Make sure you agree in writing on everything that ownership covers: the source code, the 3D model files, account access, and any third-party components used in the project.
Owning the build outright does not mean every future update is free. Before you compare a custom development quote against a monthly app subscription, ask who handles file hosting, routine maintenance, theme compatibility checks, and adding new products or finishes down the road.
The main tradeoffs with a custom build are a larger upfront investment, a longer production timeline, and the need to work with a developer. You will also need to supply thorough product specs and review the work at each milestone. Custom development makes the most sense when that extra control solves a real business or product requirement, rather than just making the project more complicated.
Connecting the preview to the order
You need to plan the visual 3D experience and the checkout behavior side by side. Spell out which customer choices map to actual Shopify variants, how price changes are calculated, and what exact details your fulfillment team needs to see on the order.
Shopify natively supports line item properties: custom bits of information attached directly to an item in the cart and final order. Each property pairs a label with a value, such as “Engraving” followed by the exact wording the shopper typed in.
A developer can capture those line item properties using custom input fields inside your product form or through Shopify's AJAX Cart API, which lets front-end website code talk directly to the cart. That works really well for custom engraving text or extra assembly notes. Just remember to treat line item properties as informational notes riding along with the item; you still need to define separately how a customer's choices change the price, inventory count, and shipping rules.

Which level fits your store?
Always start with the simplest route that satisfies how your customers buy and how your team fulfills orders. A more advanced 3D preview only earns its keep if it helps shoppers understand choices they would struggle to picture otherwise.
| Route | A practical fit | Main consideration |
|---|---|---|
| Built-in variants | Defined combinations that images can explain | Option limits, variant compatibility, and no model-based variant media |
| Configurator app | Requirements that fit an existing app's controls | Recurring terms, plan features, branding, and option support |
| Custom build | A specific visual experience or configuration workflow | Upfront investment, development time, and ongoing responsibility |
If you sell furniture, ask whether buyers truly need to see modular components swap in and out in 3D, or if they simply need to compare wood and fabric finishes. If you sell homeware, consider whether custom personalization really needs a live visual preview on the model or just a clean, reliable text box. If you sell complex equipment, focus first on enforcing valid part combinations and generating a clear order record for your warehouse.
Write down one complete customer journey from the first option click all the way to the finished order in Shopify admin, and judge all three routes against that exact same scenario so your comparison stays fair.
What a custom build needs from you
Before kicking off a custom build, pull together clear product photos, exact dimensions, and your full list of options. Include close-up shots of important details and explain which parts of the product stay fixed, which parts swap out, and which combinations you do not allow customers to buy.
For materials and colors, provide physical samples or clear reference images that your team can use to sign off on the 3D finishes. If you offer text personalization, explain exactly where the lettering sits on the item and what character limits or rules the interface needs to show the buyer. Finally, flag every choice that changes the product price or requires special handling during fulfillment.
Because 3D Vision Art also builds the 3D product models in-house, you do not need to have existing 3D files ready before talking to us about a project.
Approve the model, then the appearance, then the final experience

At the model stage, check the overall shape, dimensions, and individual parts against your product reference material.
At the materials and colors stage, inspect each available finish to make sure the surfaces look accurate, and resolve any naming differences between your store catalog and the 3D files.
At the final stage, test the working configurator right on the product page. Click through allowed combinations, make sure restricted choices are properly blocked, check how the price updates, and test any text personalization. Confirm that both the cart and the final Shopify order clearly list everything the shopper picked, and test the AR view on real phones if AR is part of your scope.
Agree on these three approval stages before production starts so both your team and the developer have a clear, shared standard for requesting tweaks and signing off on the finished build.
FAQ
Can I get a configurator by uploading a GLB file?
Uploading a GLB model simply adds a 3D file to your product media gallery; it does not create selectable option buttons or tell Shopify how to process a customized order. Shopify's documentation supports GLB and USDZ model files up to 500 MB, and you need a compatible theme to display them on the page. To build an actual configurator, you still need a way to connect the shopper's option clicks to both the 3D preview and the checkout order.
Does Shopify optimize models automatically?
Shopify states that uploaded 3D models larger than 15 MB have their geometry simplified and textures optimized automatically, while files under 15 MB are left untouched. Keep in mind that this only applies to the raw model file in Shopify's media gallery, not to configurator option rules or cart integration. Always inspect the uploaded model on the live page, and test your option choices and checkout behavior separately. Shopify also allows up to 250 media items per product, though that media gallery limit has nothing to do with how many options a configurator can support.
Does every choice need its own Shopify variant?
It helps to separate stock-tracked product combinations from custom notes entered by the shopper. In Shopify, variants carry their own price, inventory count, and shipping settings. Custom details like engraving text or extra build instructions can travel along with the item using line item properties instead. Have your developer map each option to the right method and confirm how any price changes or fulfillment rules will be handled.
Is an app cheaper than a custom build?
There is no single blanket answer without looking at your exact product requirements. You have to weigh the app's monthly plan cost, per-sale percentage fees, and paid add-ons against the upfront scope, ownership terms, and ongoing maintenance of a custom build. If an existing app already fits how your product works, it can save you from paying for custom code. On the other hand, a custom build is well worth pricing out when off-the-shelf apps cannot handle requirements that matter to your business. Always compare both options using the exact same product and ordering workflow.
Do I need a developer to add a configurator?
With a ready-made configurator app, you usually do not need a developer — you install the app, set up your options inside its dashboard, and connect it to your product page. A custom-built configurator does require a developer, along with a Shopify theme that supports 3D models. And if all you need is a simple option like an engraving text box, a basic product-options app may cover it without needing any 3D assets at all.
Will shoppers be able to use AR?
Standard 3D models on Shopify can be viewed in AR on supported phones, but you should explicitly define and test how AR works with a configurator. Ask upfront whether launching AR will show the exact parts and finishes the customer just selected on the page. Make sure that behavior is written into your agreed project scope, and test it on the actual mobile devices your buyers use rather than promising it will work on every phone automatically.
What happens when my product options change?
Put a clear update process in place before your configurator goes live. Ask which everyday option changes your own team can make on its own, which updates will require a developer, and how new 3D parts or finishes will be modeled and approved. Make sure your agreement covers account access, technical documentation, and ongoing support terms — because a one-off build quote covers the initial launch, not the cost or responsibility of future catalog updates.
Plan your Shopify configurator
If your requirements point toward a custom experience, explore 3D Product Configurator Development from 3D Vision Art. Share your product references, option list, and intended ordering process to discuss a suitable scope.
Tell us what shoppers should be able to customize in your store.
Get a Free Quote ↗