A 3D product configurator lets online shoppers switch out a product's options and see their exact selection come together in an interactive view. Budgeting for one involves more than just the software itself: your products need properly built 3D models, the option rules have to work smoothly together, and the customer's chosen setup has to pass cleanly into the final order.
For a Shopify store, this guide looks at the two main paths: renting an off-the-shelf configurator app or commissioning a custom build that you own. Renting puts you on a recurring software billing cycle, whereas a custom build concentrates more of the investment into an upfront project followed by ongoing technical upkeep.
Neither approach is automatically the cheaper choice over three years. Below, we break down software vendors' published app prices using clearly stated math, and then walk through what needs to go into a custom build quote. Because 3D Vision Art prices custom builds on a per-project basis, we do not put a generic price tag on that route here; instead, we show you the exact line items to ask for when requesting a quote.
Start with the same product and buying journey
Before you start comparing numbers, write down what your shoppers actually need to customize. If you sell a chair, that might simply mean picking an upholstery fabric and a leg finish. If you sell technical equipment, it might mean selecting compatible add-on accessories while watching the price update on the page.
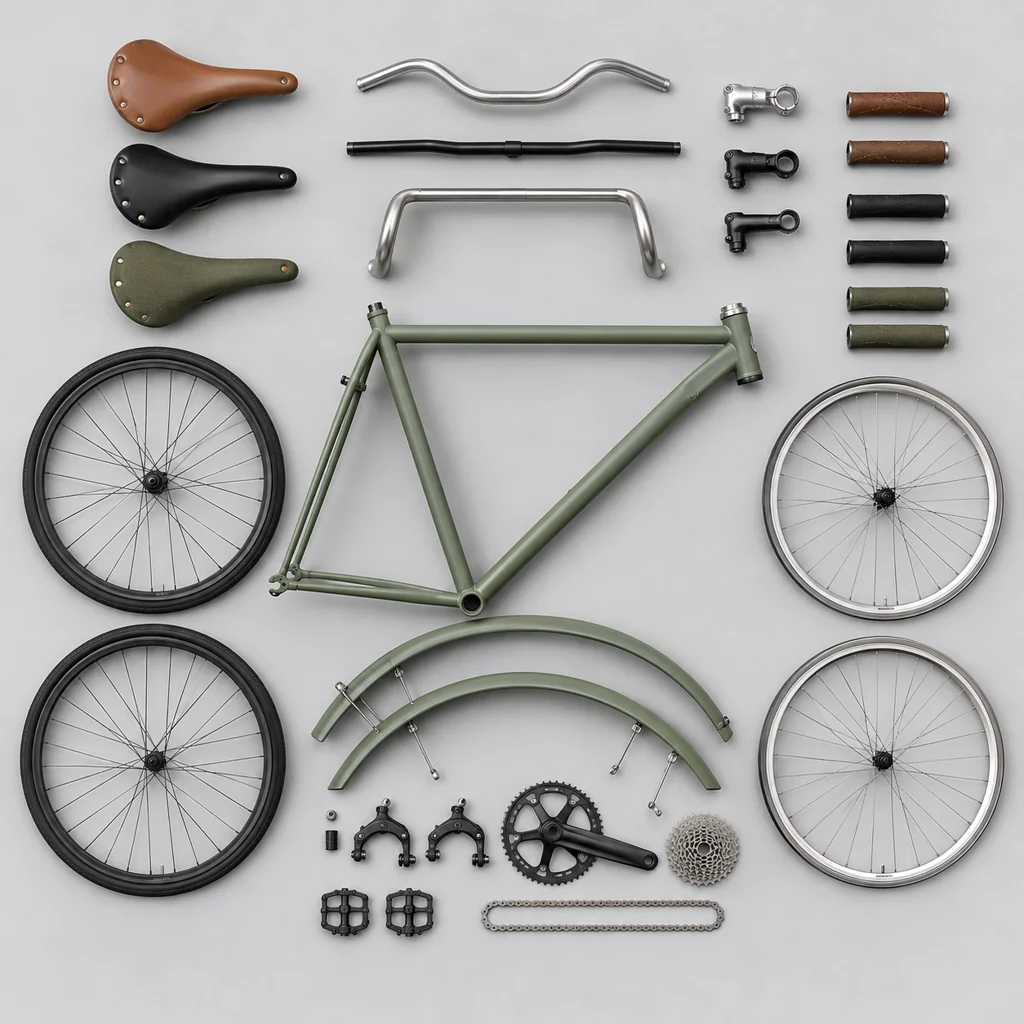
List the exact products, finishes, allowed combinations, and order details your fulfillment team needs to see. In practice, a variant is a specific sellable combination, such as a chair in a chosen fabric and leg finish. Conditional logic refers to the rules that allow or block certain choices based on what the shopper picked earlier.
Draw a clear line between must-have features and nice-to-have extras. Only include mobile support, text personalization, saved designs, or quote-request forms if they actually serve how your customers buy. Make sure you measure both the app subscription tier and the custom build proposal against that exact same checklist; otherwise, whichever quote looks cheaper may simply be pricing out a much smaller product experience.
Route A: rent a Shopify configurator app
Subscribing to an app gives you access to a ready-made platform under the vendor's terms. Instead of paying a developer to build an entire application from scratch, you set up your products inside the features the app already supports.

The price breakdowns below come straight from the software vendors' own published pages rather than industry averages or recommendations. They highlight two common ways apps charge stores: a flat plan fee with zero configurator transaction fees, versus a monthly plan fee paired with per-sale charges.
Published plan prices and a three-year calculation
The monthly figures below are taken directly from each provider's Shopify App Store listing. The totals are our arithmetic, not three-year offers published by the providers.
Both app listings state that billing runs every 30 days. According to Shopify's billing documentation, recurring app charges are billed right at the start of each billing cycle. Because of that, our three-calendar-year calculation counts 37 full recurring charges, starting the day paid service begins, with no free trial period or refund factored in. Even though the final billing cycle stretches past the end of the three-year window, this reflects the actual charges incurred over that timeframe rather than a simple calendar-month estimate or invoice payment schedule.
Assumptions: unchanged rates and plan tiers, uninterrupted service, and no annual-billing discounts. The totals leave out taxes, initial setup, 3D modeling, paid add-ons, and usage or transaction fees. Always verify the exact billing terms before locking in your budget.
| Provider and plan | Published monthly price, USD | Calculated base fees: price × 37 | Products included | Conditional logic |
|---|---|---|---|---|
| Angle 3D Configurator — Basic | $39 | $1,443 | 10 | No |
| Angle 3D Configurator — Premium | $69 | $2,553 | 40 | Yes |
| Angle 3D Configurator — Professional | $99 | $3,663 | 100 | Yes |
| Angle 3D Configurator — Enterprise | $199 | $7,363 | 500 | Yes |
| Zakeke — Starter | $69.90 | $2,586.30 | 10 published | — |
| Zakeke — Grow | $129.90 | $4,806.30 | 50 published | — |
| Zakeke — Scale | $299.90 | $11,096.30 | 100 published | — |
The plan limits matter just as much as the monthly sticker price. Angle's Basic plan — the lowest-priced row in the table — does not include conditional logic, the rules that prevent incompatible option combinations, which means any store that needs those rules has to start on Premium rather than Basic. Meanwhile, Zakeke's product caps count published products, and its Starter tier displays a "Powered by Zakeke" badge on the storefront, whereas Grow and Scale offer white-label views.
Sources: Angle 3D Configurator's Shopify listing and Zakeke's Shopify listing. Treat these numbers as subscription baselines rather than complete launch or total ownership budgets. All prices and plan allowances were checked on 14 November 2026; because vendors update both over time, check the live listings again before relying on these totals.
Read the plan conditions alongside the price
Angle's own pricing page notes that it charges zero transaction fees. Instead, its tiers scale by product caps, texture allowances, and unlocked features. A texture is simply the flat image file used to give a 3D surface its visual finish. Always check which tier actually fits your finish library and option controls rather than picking a plan by the entry price alone.
Zakeke's listing states transaction fees of 1.9% for Starter, 1.7% for Grow, and 1.5% for Scale, applied to products sold through Zakeke. When running your numbers, add those fees only to the revenue you expect to run through the configurator rather than applying them across your entire store's sales.
Note that Zakeke's own pricing page and its Shopify App Store listing show a slight difference on the minimum transaction fee: the Shopify listing notes a minimum of 2 cents, whereas Zakeke's own website states a minimum price floor of $0.03. It is a tiny difference, but worth confirming with the vendor before modeling high-volume small orders. Both providers also offer discounted annual billing plans, which are left out of this monthly-rate table, and Zakeke's listed free tier applies strictly to development stores rather than live storefronts.
App costs that the subscription table leaves out
Model preparation and initial setup
Paying for an app subscription does not mean your products are already modeled in 3D. As shown in Zakeke's asset guidelines, you still have to supply a properly prepared 3D product model that meets the configurator's technical rules.
Find out upfront who is building or prepping the 3D files, matching the surface finishes, and setting up the swappable parts inside the app. Send over your product photos, dimensions, and any existing CAD or 3D files so they can be evaluated properly. Even if the same studio or vendor handles both the 3D assets and the app setup, ask them to break those two steps out separately in the quote.
If you already have a 3D model on hand, verify whether it is actually built for interactive part-swapping. Never assume that a 3D model originally built for still studio renders will drop straight into a live configurator without extra technical preparation.
Per-variant work and growth into another tier
Zakeke's Scene Editor documentation walks through how individual product parts and materials have to be linked and configured inside the software. That highlights the hands-on setup work that happens after you click install: someone still has to wire up every changeable part and test the result on screen.
Ask upfront how adding a new finish, a new swappable part, or a brand-new product down the road will be billed. There is no universal per-variant rate across the industry; depending on your setup, that work might take up your internal team's hours, trigger an external setup fee, or fall under an ongoing service retainer.
Make sure you budget for the subscription tier your catalog will grow into, not just the tier that fits your launch week. Stepping up into a higher plan tier as you add SKUs is a separate cost driver from a software vendor raising the price of your current tier. Keep an eye on both possibilities without assuming either is guaranteed, and ask which specific product caps, feature gates, or traffic thresholds could push your monthly bill higher.
Paid extras and ongoing administration
Look closely at whether extra platform tools carry their own per-use charges. For instance, Zakeke's optimization documentation lists $0.60 per model-optimization run across its Starter, Grow, and Scale plans. That fee only covers running an existing file through Zakeke's automated optimizer tool, not building a finished 3D product model from scratch.
You also need to factor in the day-to-day time spent keeping option lists current, verifying price updates, running test orders after catalog edits, and training whoever manages your store. Clarify what the app vendor's customer support actually handles versus what stays on your team's plate.
To build a realistic three-year app budget, combine the base subscription charges, expected per-sale transaction fees, paid add-ons, upfront 3D modeling and setup work, and routine catalog administration. And if your roadmap already includes moving off the app later on, factor the future migration work into your numbers too.
Route B: commission an owned custom configurator
An owned custom configurator is a bespoke development project built around your store's exact workflow. The initial build can cover the 3D models, the on-page buyer interface, the option logic, and the Shopify checkout integration—with the exact deliverables and ownership rights spelled out in your contract.
To give a general sense of scale, third-party studios publish broad price ranges for custom configurator builds: PixReady puts an interactive configurator at $5,000–$30,000+, while Framesixty, citing Hon Tran (2026), lists real-time WebGL configurators starting from $4,000 for one product up to $150,000+ for complex enterprise systems. Those numbers are other providers' published estimates rather than 3D Vision Art rates; where your specific build lands depends entirely on your products, option count, and business rules, which takes a project-specific quote to pin down.
Model preparation
Start with a clear list of the products, surface finishes, and swappable components you need modeled. Ask the studio which existing CAD or 3D files can be reused and which pieces need to be built from scratch, and agree on the level of close-up detail buyers need to see on screen.
At 3D Vision Art, still product renders start from a high-detail master model. Creating an AR file from that master model requires a separate optimization pass priced as its own deliverable; if a client only wants AR from the start, we build the model directly to AR specs. In plain terms, AR lets shoppers project the virtual product into their real room through a phone camera. Never assume AR support is automatically bundled into a configurator quote unless it is explicitly written into the scope.
A live 3D configurator also needs a real-time web model prepared separately from the heavy studio render file. Looking at Angle's 3D model guidelines as a practical benchmark, a real-time configurator asset needs to be a low-poly GLB under 15 MB, split into separate named parts rather than merged into a single solid mesh so each component can change independently. Building and optimizing that real-time model is a core part of the project scope, so ask to have it listed as its own line item in the quote.
Configurator development
Your development brief should spell out how the 3D viewer, option pickers, mobile screen layout, and any custom text or saved-design tools need to work. Ask the developer which everyday tweaks your own team will be able to manage in the admin panel and which updates will require code changes.

Lock in the milestone review process before anyone starts building. For the 3D assets, our studio runs a staged sign-off: you approve the clay/model geometry first, then the texturing/materials, and finally the rendered shots. Checking the uncolored clay model first makes sure every shape and proportion is right before surface materials go on. Alongside that visual sign-off, agree separately on how your team will test and approve the option logic, dynamic pricing, and cart behavior before final launch.
Variant logic and order integration
A great-looking 3D preview is only half the job—the order still has to land cleanly in your warehouse. Spell out which option combinations are allowed, which choices change the product price, and what exact details need to show up in the cart and final order record.
Zakeke's cart integration documentation shows why this link matters, detailing how custom prices, chosen attributes, and summary thumbnail images pass into the checkout flow. When scoping a custom build, base those cart requirements directly on what your own fulfillment team needs to build and ship the item rather than copying another platform's feature checklist.
Make sure you ask how the interface will handle blocked combinations, mid-session option swaps, and out-of-stock parts, and include full end-to-end testing and team handover in the written scope. A solid custom quote will map out all of that checkout plumbing clearly rather than just promising a 3D model that changes colors on screen.
What ownership does—and does not—remove
Commissioning a custom build lets you swap a recurring configurator app bill for a one-time development project, but it does not eliminate your standard Shopify plan fees or the ongoing work of keeping custom web software healthy.
Make sure your contract confirms who owns or licenses the source code, the 3D models, the user interface, and any third-party libraries. Ask for full repository access, clear technical documentation, and a clean handover package so another capable developer could step in and maintain the system later if needed. Simply calling a build "custom" does not guarantee you own those rights automatically.
Ongoing operational costs to factor into your budget include:
- Hosting and delivery: where the custom app logic and 3D model files are hosted, and who pays the monthly server or CDN bills. Shopify's deployment guidance outlines how externally hosted app components work; your exact hosting setup will depend on how your configurator is architected.
- Compatibility maintenance: Shopify's API versioning documentation explains the regular platform updates developers have to keep pace with. An API is simply the bridge that lets two pieces of software talk to each other. Clarify upfront who is responsible for updating any API connections your configurator relies on.
- Security and support: put an agreement in place for dependency updates, uptime monitoring, backups, and troubleshooting if something breaks. Shopify's security guidance highlights the ongoing need to keep software libraries patched and infrastructure access locked down.
- Catalog changes: adding new swappable parts, fresh finishes, updated compatibility rules, or brand-new product lines requires an agreed workflow and pricing structure.
Your true three-year cost for a custom build is the initial development quote plus agreed hosting and operating services, routine maintenance, new catalog additions, and feature updates over those three years. Always ask for realistic estimates across each of those buckets instead of treating unquoted future upkeep as zero.
When renting wins, and when owning wins
Renting an app is often the smarter buy when an existing platform already covers your option rules out of the box and you prefer predictable monthly billing over managing a software build. It is also a practical way to validate shopper demand on a new customizable product line before investing in bespoke code.
Owning a custom build makes more sense when your product or checkout workflow simply cannot fit inside an off-the-shelf app's rules, and the combined cost of the initial build plus three years of upkeep stacks up well against the app tier and transaction fees you would otherwise pay. It gives you full control over how the page looks and runs, provided you have the development budget and a clear plan for ongoing maintenance.
| Decision | Renting an app | Owned custom development |
|---|---|---|
| Initial commitment | Existing software; assets and setup still need scoping | More work commissioned upfront; scope can match specific requirements |
| Changes | Provider controls the core product; available settings may cover your needs | Changes can be commissioned; development capacity and budget are required |
| Ongoing cost | Plan, applicable fees, extras, and administration | Hosting, maintenance, support, and agreed changes |
| Leaving or handing over | Check exports and contract terms | Check source access, licenses, documentation, and transfer arrangements |
Keep in mind that renting an app does not necessarily mean forfeiting your 3D files if you leave later. For example, Angle's FAQ notes that merchants can download their current 3D model. While exporting a model file does not mean you can take the app's user interface or option rules with you, it shows why you should always check 3D asset ownership and software portability as two separate questions.
Ultimately, nobody can give you an honest break-even timeline without comparing a real custom build quote against your store's projected app tier and sales volume. Line up the complete three-year totals for equivalent features on both sides, using the exact same catalog growth assumptions. Choosing to own your configurator can still be the right strategic move for brand control even if the three-year math comes out higher—just recognize that as a control decision rather than an automatic cost saving.
Frequently asked questions
What is included in the three-year app totals above?
Those figures cover only the published base subscription fees under the stated 30-day billing math. They leave out 3D model creation, initial app setup, per-sale transaction fees, paid add-ons, taxes, and your internal team's time. The math also assumes you stay on the exact same plan tier at the same monthly price for the full period. Plug in your actual billing dates, required add-ons, and projected custom sales volume to build a real budget for your store before signing up.
Can I start with an app and move to a custom build later?
Yes, plenty of stores take that path, provided you check the exit terms before you start. Ask the app vendor upfront which 3D models, texture files, option trees, and configuration rules can be exported, and confirm that you hold the rights to reuse those assets outside their platform. Remember that downloading a raw 3D model does not export the front-end interface or Shopify cart logic, so make sure your future custom build budget accounts for rebuilding the interface and migrating your catalog data.
Does a custom configurator have no monthly costs?
Not necessarily. While an owned custom build eliminates the monthly configurator app license and per-order app commissions, you may still have recurring bills for file hosting, technical support, API maintenance, or third-party infrastructure. Ask your developer to separate the one-time build cost from ongoing monthly or annual operating costs, and clarify which recurring services are strictly required to keep the configurator live alongside your regular Shopify store plan.
Will every color or material option need another model?
Never build your budget on that assumption. Instead, check whether your options keep the exact same physical shape or require swapping out different 3D parts and dimensions. Changing a fabric color or wood stain is a very different task from modeling a brand-new physical attachment. Have your 3D studio review your complete option sheet and price out the base 3D modeling, material creation, option rule setup, and quality testing separately, rather than assuming extra variants are either free or billed at the same rate as a full model.
Which route is cheaper for a small catalog?
A small SKU count by itself does not settle the math. If an off-the-shelf app already handles your exact option rules, renting can be very cost-effective—especially when writing custom code would not add any practical value for your shoppers. Still, you need to add up the plan tier that unlocks your required features, the initial 3D setup work, and any per-sale transaction fees, and then compare that three-year total against a real custom build quote; there is no magic SKU threshold where custom ownership automatically becomes cheaper.
What does 3D Vision Art charge for a custom build?
We quote every custom configurator build individually based on your project scope. Send over your product reference photos, option tree, required Shopify checkout behavior, any existing 3D files, and your ongoing support expectations. We separate the upfront modeling and development deliverables from any ongoing maintenance options so you can compare our quote side by side against the app subscription tier your store would actually need.
Discuss a custom configurator for your store
If your requirements point toward an owned build, explore 3D Product Configurator Development from 3D Vision Art. Share your product and option list to discuss a scope that includes the visual assets, buying logic, and store integration you need.